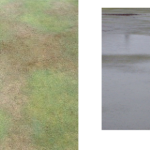
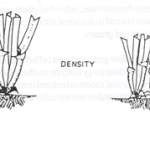
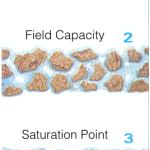
Home » Articles

Fix your bowling green step 3

Root mass is important for a healthy bowling green

In parts 1 and 2 of this series on how to fix your bowling green, we discussed the process and importance of taking regular soil profile samples and discovered what the soil sample can actually tell us about the condition of the green. In part 3 John links this to demonstrate why each of the visual signals from the soil sample point clearly to one or more of the multitude of issues we experience on poorly performing greens. From disease outbreaks to skinning of heads and bad runs on rinks, the humble soil profile sample can tell us a lot about where we're going wrong and point to the answers that will help us create a performance bowling green in the near future.

Read more

Fix your bowling green step 2

Thatch Layer

In this article we take the soil samples you removed in Fix your bowling green Step1 and look more closely at them to discover what's going on under your green. This is one of the most valuable practices that any greenkeeper can undertake as it can reveal a wealth of information about the condition of your green that you could previously only guess at.

Read more

Fix your bowling green step1.

Smoothness and Colour

I genuinely believe that it's possible to come up with a formula to fix your bowling green, regardless of it's current condition. This is due to one over-riding fact that I've discovered after looking at literally hundreds of greens. They are all at some stage of what I've termed the Circle of Decline. The critical factor in making this possible is simple. You must know what you are dealing with and there is no way to find that out without carrying out some hand dirtying investigative work. So let's get dirty!

Read more