Home » agronomy » Page 4

Tag: agronomy

Deal with thatch and compaction Now

Regular readers of my articles will know my views on bowling green maintenance problems; essentially there are only 2 that you have to worry about.

Everything else that goes wrong with greens is a symptom of these big 2 issues or indeed a symptom of the commonly held views on how to tackle the big 2.

What are the big 2?:

  1. Thatch: the build up of dead shoots, roots and debris on the turf surface that can get out of hand very quickly and cause or contribute to a huge number of problems. See my article on the circle of decline here
  2. Compaction: the squeezing of air out of the soil profile by foot and maintenance traffic.

Why I am banging on about this again?

Well hopefully your autumn and winter program is fully geared up to dealing with these two big issues.

By now I hope you have undertaken any major thatch removal work required and that you are now embarking on “an all winter long” attack on compaction.

Regular deep slit tining is the best way to relieve compaction; please note this is not a one off job regardless of how impressive the machine used.

It is necessary to continually slit tine the green through the winter to a depth of 150mm or deeper if you can.

Once a week isn’t too much, twice a month is more typical; stop during frost or excessively wet conditions but pick it up again as soon as possible afterwards.

For a full appraisal of essential winter maintenance tasks for your bowling green the Autumn/Winter report is still available at half price:

Autumn and Winter Bowling Green Maintenance Guide
The ultimate guide to Autumn Renovation and Winter Bowling Green Maintenance detailing the essential maintenance your bowling green needs through this most critical of maintenance seasons. What you do now will determine how the green performs next season. INSTANT DOWNLOAD ebook more details
Price: £9.97

for effective Bowls Green Maintenance water Deeply not Daily!

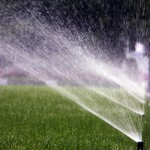
Bowling green irrigation or watering is often mis-understood and as a result is often managed insufficiently to ensure that the green performs to its highest standards.

The first thing is to make sure of, is that you are applying enough water every week and that means trying as best you can to keep a record of any rainfall and irrigation that is going onto the green.

Making irrigation management a priority in your bowling green maintenance program is crucial because in a typical dry week your green will lose the equivalent of 25mm of moisture through evaporation from the soil and transpiration from the grass plants ; please remember that this varies considerably around the country and will depend on things like temperature, relative humidity, wind speed and direction, precipitation and of course your bowling green maintenance program.

This means that you should be aiming to get at least that amount back on.

In Performance Bowling Greens, a practical guide I go into detail about Soil Moisture Deficit and how to keep a water balance sheet for the most accurate and efficient way to manage irrigation and that is a really good method to use to get this right.

However, bowling green maintenance at the height of the summer relies a lot on feel for the soil as well and although I would always try to maintain a manageable Soil Moisture Deficit to encourage deeper rooting etc, it is more important right now to get on sufficient water to ensure your green plays consistently and to keep localised dry patch under control or hopefully at bay.

This means you should be aiming to get 25mm of water on in any dry week, making allowances for any rainfall you have had by reducing that amount accordingly.

The most common pump and sprinkler set ups for bowling green maintenance from most of the major irrigation manufacturers will put out approximately 1mm of water for each 2 minutes of system run time.

This means that you need to run the system for 2 minutes per head to replace 1mm of water lost. Remember that is “per head”.

So for a 25mm watering you need to run the system for 50 minutes per head during a 7 day period.

The most effective way to do this is to get this water on in as few applications as possible. Try to aim for 25mm over 3 nights. This is much more effective and makes much better use of precious water than 7 light applications where much of the water is lost to evaporation in the morning.

In my Bowling Green Maintenance book: Performance Greens, a practical guide I go into this subject in quite a bit of detail and lay out a plan that you can use to manage irrigation more effectively.

Greenkeeping Advice Leads to Disaster

Someone searched by this term on the web and was directed to the site.

Now I normally pick out the most popular search terms to try to answer the underlying question, but this was a single and very different search term and I thought it was very interesting.

The title tells the full story; someone is of the opinion that the greenkeeping advice they received caused the opposite result from the one they expected.

This is probably due to one of two common problems; both of which I tease out and put a bit of detail on in the opening section of my eBook Performance Bowling Greens, a practical guide:

Problem Number 1. A lot of the advice that is available is non-committal, playing it safe or just wrong; for example a lot of “advisers” still peddle the same old advice which usually includes some of the most damaging practices you can inflict on a bowling green like top-dressing with high sand content top-dressing.

Problem Number 2. Bowling clubs have a high degree of impatience when it comes to waiting for improvements to materialise on their green. Even when following the correct regime there is usually a period of renovation required to get things moving in the right direction and this is why many greens never improve to any great degree; clubs don’t stick to a plan.

Now this is understandable to a degree because most club members quite rightly want a good green…now; they are paying their membership now, so now is when thy want results. This leads to desperation mode, another factor that creeps into clubs from time to time and again detailed in Performance Bowling Greens.

This is so common that many of you who have read the eBook have written to say that they recognised their own club in the examples I gave.

So when someone says that the advice they have received has caused a disaster its usually due to one of these problems.

Irrigation, how much is enough?

Irrigation, how much is enough?
irrigation management is critical but straight forward

Irrigation is on everyone’s mind at the moment, but how much is enough?

As a general rule greens lose approximately 3-4mm of moisture per dry day to evapo-transpiration, although this can vary with conditions; that’s approximately 25mm or 1 inch per week.

Again a very general rule is that many of the more popular automatic sprinkler systems will apply around 1mm of water for every 2 minutes of run time.

So again as a general rule to replace a week’s worth of losses you should be running the sprinklers for around 50 minutes in the week.

Now I will add a qualification or four to that:

  1. requirements can vary widely depending on location and conditions.
  2. don’t apply light applications on a nightly basis, try to group these into heavier and less frequent applications for best effect.
  3. try to move to a water balance sheet type system to manage irrigation more accurately…it will pay off quickly
  4. don’t rely on a typical bowling green irrigation system to apply water evenly or in sufficient volume…always check and measure what you are doing.

Irrigation management and water balance sheets in my book Performance Bowling Greens.

any questions please ask!

Localised Dry Patch still causing problems in autumn

Localised Dry Patch causing seed problems

Over-seeding of bowling greens seems like a straight-forward task; you put the seed on and the green’s bare areas recover.

However, one of our regular readers has raised an interesting question today about over-seeding and it is by no means isolated.

After over-seeding the green, the seed has taken well on the parts of the green that least needed it and nothing has happened on the barest areas of the green where the new grass is most needed!

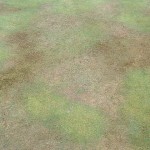
This is unfortunately a very common problem and is usually related to our old friend Localised Dry Patch (LDP).

The barest areas of the green going into the autumn are usually the spots that have been affected by LDP and as such are bare due to lack of soil moisture.

This means that quite a lot of preparation is required before seeding and this might even include heavy watering to get the soil to hold enough moisture to get the seed off to a good start.

It might be necessary to do some light cultivation with a Sarrell roller or hand cultivator and, if the underlying soil is still dry and water repellent, a wetting agent would also help.

The main problem is that we are now a bit late for further seeding, although this largely depends on the weather and temperature. I have seeded successfully up to Christmas in the past, but success with this is obviously dependent on the remainder of the winter. Certainly if we were to get another one like last year, even early seedings will struggle to survive the winter.

If anybody is still having trouble getting grass cover on the green after overseeding please feel free to contribute ideas, tips or questions to the site.

Deeper Faster Bigger…Better…Not in Bowls Green Maintenance!

Next question to ask as a matter of urgency:

Does anyone have plans to get rid of compaction once and for all by hiring in a guy with a tractor and a big spiker that can go in 12, 16, 18, 20 inches? You add your own number here.

Pointers:

  1. Compaction is an on-going issue; it’s natural and happens due to play, maintenance, weather etc.
  2. There are of course factors that make compaction worse or better such as soil type and maintenance.
  3. You can’t “get rid” of compaction once and for all; compaction management is an on-going bowling green maintenance task.
  4. Compaction relief is best tackled mainly throughout the winter months by old fashioned (unfashionable) deep slit tining to 6-8 inches depth.
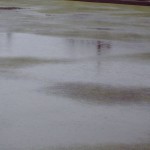
  5. Green flooding is more commonly caused by thatch than compaction
  6. Deeper isn’t better in this case; anything deeper than 8 inches risks damaging the subgrade of your green permanently.
  7. Don’t take a tractor on your green please!

does Calcium have a place in Bowls Green Maintenance?

It’s essential for strong teeth and bones; I know that much from school, but where does Calcium fit into a bowling green maintenance program?

When we hear discussion of soil nutrients, it is usually in terms of Nitrogen, Phosphorous and Potassium; the famous NPK, that we see written on fertiliser bags.

However, there are another 3 major nutrients; these are Calcium, Magnesium and Sulphur.

However, the most overlooked macro or major nutrient in bowling green maintenance is Calcium. Calcium is needed by plants to grow and maintain health. It is a key constituent of cell walls.

If calcium availability is low or compromised grass plants can experience a range of difficulties

  • Once fixed, calcium is not mobile in the plant. It is an important constituent of cell walls and can only be supplied in the xylem sap. Thus, if the plant runs out of a supply of calcium, it cannot remobilise calcium from older tissues.
  • If transpiration is reduced for any reason, the calcium supply to growing tissues will rapidly become inadequate.

Calcium plays a very important role in plant growth and nutrition, as well as in cell wall deposition. The primary roles of calcium are:

  • As a soil amendment, calcium helps to maintain chemical balance in the soil, reduces soil salinity, and improves water penetration.
  • Calcium plays a critical metabolic role in carbohydrate removal in plants.
  • Calcium neutralises cell acids.

Therefore the role of calcium in plants must not be overlooked.

In Performance Bowling Greens, a practical guide I go into this in much more detail.

Traditional Bowls Green Aeration

Rob emailed with an interesting question about using the old fashioned forking method of aeration during periods when the green is excessively wet, like now probably in many parts. Here is Rob’s full question and my reply to him earlier. If anybody has views on this subject please feel free to share:

Do you know anything about the traditional ‘raise forking’ or ‘graip’ aeration methods that were used? What kind of forks were used? (straight? curved? how thick were the prongs?) and how deep did the go down ? etc.

I am interested in such traditional techniques and yet cannot find out any information about it?

After the snow the greens are absolutely soaked through and I wondered if trying this traditional technique might dry them out with minimum disturbance?

Well, although I have used the method (under duress) in the past, I didn’t have all of the answers I would have liked for Rob:

Hi Rob and Happy New Year

I am not aware of any special equipment for this, but I have done it.

Usually this was with a normal garden fork; the technique was to work backwards and push the fork in as far as possible at intervals equivalent to the space between the tines on the fork so as to create a square hole pattern.

After pushing the fork in to full depth (6 to 8 inches) you wiggled it about and heaved it backwards slightly before removing and moving on to the next.

Back-breaking and very labour intensive mind you.

Before going to extreme measures it might be worth checking that the ground isn’t still frozen at some point below as this might be causing the slow down in drainage.

During the winter I recommend using a deep slit tiner as often as possible, which automates this procedure to some extent and has a very good effect on compaction related problems like this.

You can find articles on this here:

Last week I shared some links to resources including the most suitable machinery for this work; you can see that article here:

If any reader has some light to shed on this subject then I would be very interested to hear it.

John

Performance Bowls Greens-Making Best Use of Winter

Time is marching on and most greens have had their autumn renovation works completed and the greens have been “put to bed”, which is my least favourite phrase in bowling green maintenance.

There should be no question of putting a green to bed for winter, as the next few months are the most vital of times for starting your journey towards a performance bowling green.

Bowling green maintenance has traditionally concentrated on the bowling season and greens have to a large extent been almost neglected during the winter.

The 2 main problems that greens suffers from and which are the root cause of almost all of the difficulties we encounter on greens can only really be tackled head on during the winter.

First among these is thatch and if there is an excessive build up of thatch on your green you should be taking appropriate action now to reduce this mechanically before it gets too cold.

The remainder of the winter right up to March or thereabouts should be peak compaction relief time; this is the only time when you can tackle it properly and the best technique to use is pedestrian, deep slit tining.

So if you are not out doing this now, don’t be surprised if your green isn’t performing very well next season.

The trouble with neglecting this work is that it just can’t be caught up with again during the season, which results in a very early deterioration in condition once the season is underway; in many cases the green doesn’t really get growing until well into the late spring period. Meantime the green is being subjected to further compaction and wear at a time when recovery is limited due to cold soil and weather. If this is combined with last year’s compaction and thatch which hasn’t been dealt with properly in the close season then tgreen can deteriorate beyond recovery very early in the season.

Let’s re-cap on some of the major problems that arise from neglecting this work:

Flooding, puddles, un-even playing surface, Localised Dry Patch, bare areas, poor use of fertiliser/increased fertiliser requirements, disease, more pesticide required, more water required, moss, weeds, poor runs, slow green surface, inconsistent rinks, unhappy members etc.

Now is the time to be getting on with the early stages of renovation which will lead to a performance bowling green for your club in the future.

Irrigation for Bowls Greens

Further to my previous post a lot of clubs have been in touch recently to ask for advice about irrigation systems; mainly about the cost of installing them.

Readers of my ebook Performance Bowling Greens a practical guide will know that I am not a big fan of the industry accepted standard for bowling green watering systems. They simply don’t work well enough.

Where standard irrigation systems are struggling to apply enough water to help with fending off LDP or indeed to apply sufficient water as part of Read more